
| Brick Oven Facade |

|
|
|
|
|
|
|
|
|
|
|
|
|
|
|
|
|
|
|
|
|
|
|
|
|
|
|
|
|
|
|
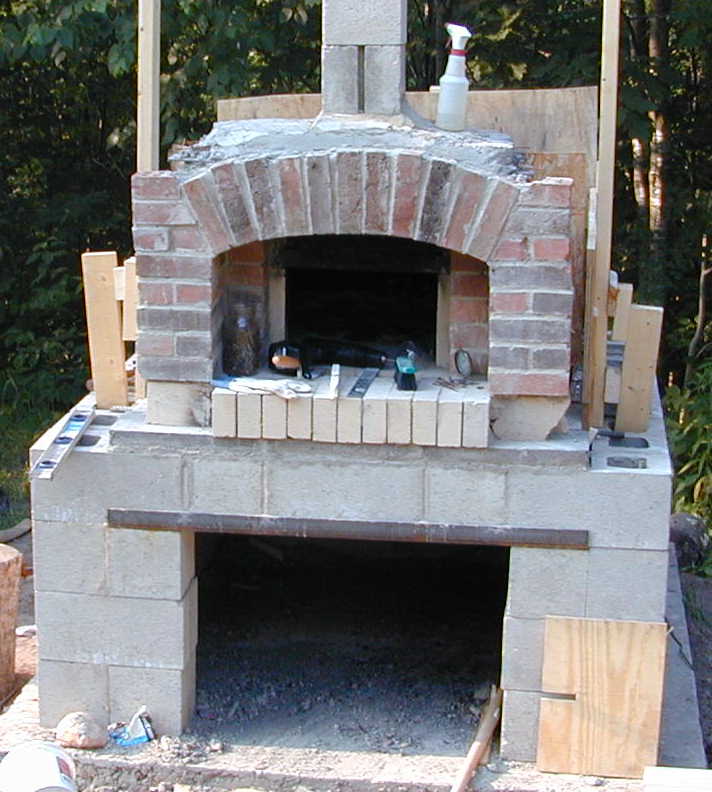
The front arch and "facade" of the oven is built with red
brick. I got these free just for cleaning them out of a guys yard. The
front of the hearth is not yet complete in front of the side walls of
the opening (you can see the empty spots). I still have to clean up
the mortar in between the front hearth bricks. The cement (cinder) blocks on top are there to mark where the chimney will continue up and out of the oven. 
After finishing the front bricks, we (FIL and I) blocked up the corners of the oven with 8x8x8 blocks. At the top of these blocks we inserted steel strapping, then filled the cores with cement. I then used 12' 4x4s along the sides to form the (for lack of a better term) sill plates for the roof rafters. We then used Perma Base cement boards for the walls. The base of the oven got an outer layer of field stone such that it looks like the entire oven base is stone. We then put on 2 layers of "stucco" on the cement board (quoted because our stucco was really 5 parts mason sand to 1 part portland). Next came the insulation. I put in all the rest of the vermiculite that I had, and then covered that with more insulation. I then cut and nailed up the roof rafters at about a 25 degree angle. Since I used 12' boards this made an overhang for the roof in front of the oven. This way I stand in the shade in front of the oven where the sun can't bake me (only the oven can :-) The stucco of the oven got 2 coats of white paint, the roof was decked with 7/16 OSB and presently is covered in roofing paper. Eventually it will probably get cedar shakes to complete the look. note: There is a really big air gap between the oven and the wood roof. The roof is also ventilated all the way around where the roof meets the wall. The gaps will be screened to keep the critters out. there is also a gable vent at the rear of the oven. also screened. Pics to come! |
| © 2001